

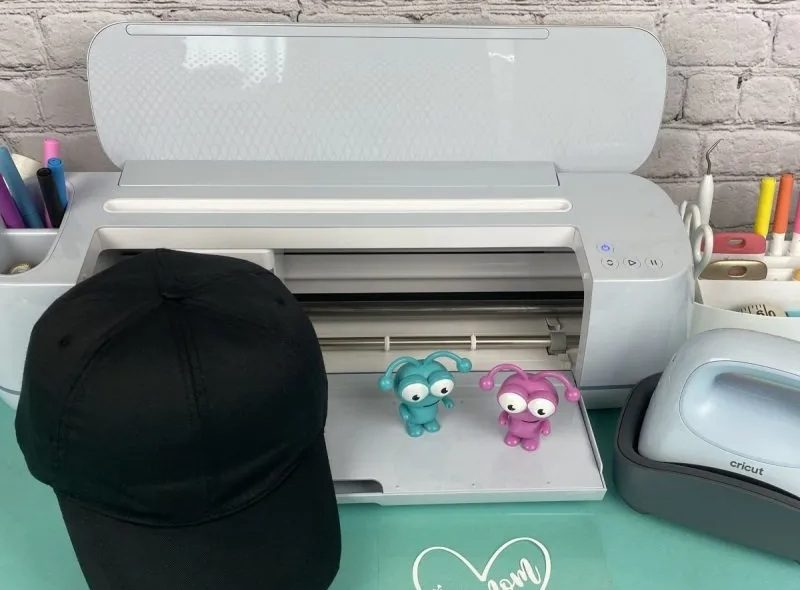
My friend decided to make a personalized birthday gift for her dad—a custom cap. She had used vinyl decals and mugs before, but this was her first time working with the Cricut Hat Press. She thought it would be pretty straightforward. She cut her design, placed it on the cap, and started pressing without using the Cricut Heat app, a hat form, or preheating the material.
She was frustrated and ready to give up, thinking she had wasted a good blank hat. But the problem wasn’t the machine; it was a lack of setup guidance. If this sounds familiar, don’t worry. You’re in the right place.
In this blog, I’ll walk you through how to use Cricut Hat Press right away—from setup to pressing—so you can avoid beginner mistakes and get clean, professional-looking results every time. Whether you’re making hats for gifts, your Etsy shop, or just for fun, this guide will make sure your first press is a success.
Let’s get started!Tools and Supplies Required for Your Project
Before diving into How to use Cricut Hat Press, let’s discuss what materials and tools can be used with the machine:
The Cricut Hat Press is designed to handle the curved surfaces of hats like baseball caps, bucket hats, and trucker hats. Here are some materials that can be used with the machine:
- Cricut Hat Press: The main device for applying heat transfers to hats.
- Cricut Hat Pressing Form: A form that fits inside the hat to provide a firm pressing surface.
- Cricut Heat App: Available on iOS and Android, this app allows you to control temperature and time settings.
- Heat-Resistant Tape: You can secure your design in place.
- Butcher Paper: Protects your design and press during application.
- Lint Roller: Removes debris from the hat surface.
- Design Materials: Heat transfer vinyl (HTV) or infusible ink.
- Cricut Cutting Machine: To create your design.
Three Heat Levels of Cricut Hat Press
This heat press machine has three levels: Low, Medium, and High. Each level is designed for specific materials and has a corresponding time setting.
- Low (one bar) – This setting is for sensitive or heat-transfer materials requiring a heat setting of 255°F to 295°F. It automatically sets for 60 seconds.
- Medium (two bars) – This setting is for base materials like everyday iron-on, Cricut Express Iron-on, and standard iron-on vinyl that require heat settings of 300°F – 355°F. It also automatically sets for 60 seconds.
- High (three bars) – This setting is used for Infused Ink materials, heavy-duty base materials, and other heat-transfer materials that need higher temperatures, 360°F —400°F. It has an in-built timer of 90 seconds.
How to Use Cricut Hat Press With HTV Iron-on?
The Cricut Hat Press is a specialized heat press designed specifically for applying heat transfer materials onto hats.
Step 1: Prepare Your Machine
- Plug your heat press machine into the power outlet.
- Turn on your machine by pressing the power button.
Step 2: Design Your Art
- Open Cricut Design Space and start preparing for your design.
- Make sure to measure your hat and size your design so your hard work isn’t wasted.
- Search for Hat Press Design in Design Space. This template is sized to fit Cricut Hat blanks.
- Ensure you mirror the design in the Cricut Design Space App to prepare it correctly for heat transfer.
- Click the Make It button at the top right.

- Select your cut settings.
Step 3: Start Cutting
- With the shiny side facing down, place your iron on the mat.
- Cut your design using the cutting machine. After cutting, weed out the extra vinyl to reveal your design.

Step 4: Open Cricut Heat App
- Open the Heat app and select the heat press you’re connecting to.

- Click Start New Project under the My Heat Presses section.
- Then, you have to choose your base material and transfer material, and select Next.
- Select the type of iron-on you’re using.
Step 5: Set Up Cricut Hat Press
- Once you’ve made all the selections, tap on the Send tab at the bottom of your screen.
- The app will guide you through preheating the base material, positioning the transfer design, and applying heat with the press.
- Now, it’s time to set the time and temperature for your machine.
- Adjust the time and temp settings based on your material’s requirements.
- Once you send the instructions to your machine, it starts heating up, and it will let you know when your press is heated.
Step 6: Position Design
- Preheat your hat for at least 5 seconds.
- Secure the design to the hat form with heat-resistant tape, smoothing it out to prevent wrinkles.
- Ensure the hat is securely placed on the hat press form.
- Press the machine on the design for 60 seconds, following the app’s instructions for time and pressure.

Step 7: Reveal Design
- Let your hat cool for 5-10 minutes, and then peel off the clear plastic liner.
- Now, unplug your heat press and allow it to cool down.

These steps ensure you can create personalized hats with high-quality results. This tool opens up endless possibilities for personalization, whether for gifts, business, or personal use. Happy crafting!
Frequently Asked Questions (FAQs)
How to Use Cricut Hat Press without the Cricut Heat App?
Here’s how to use the heat press machine without the app after activation:- Initially, use the Cricut Heat app to connect and activate the machine via Bluetooth.
- Plug the machine into a power source and turn it on using the temperature button.
- Once powered on and connected, you can adjust the temperature and time using the buttons on the machine itself.
- Place the hat and HTV/infusible ink material on the machine.
- Then, press the “Go” button to begin the heat-pressing process.
- The heat press will beep when the timer is complete, depending on the machine model.
How long does vinyl last on hats?
Heat transfer vinyl (HTV) on hats can typically last between one and two years or up to 50+ washes, depending on the type of HTV and how well it’s cared for. Due to their unique properties, glitter and holographic vinyl have a shorter lifespan than standard vinyl.
However, with proper care, such as washing the hat inside out in cold water and avoiding harsh chemicals, the lifespan of HTV can be extended.
What Type of Vinyl should be used for hats?
Heat transfer vinyl (HTV) is the best option for applying designs to hats. It is designed to be pressed onto fabric using heat and pressure, allowing you to create durable and customized designs on hats. While regular HTV works, flocked or glitter, HTV is often preferred for hats as it offers a more premium look and feel and can help prevent wrinkles when pressed onto the curved surface of a hat.
 :
https://www.pinterest.com/Robertjohnsonusa
:
https://www.pinterest.com/Robertjohnsonusa


