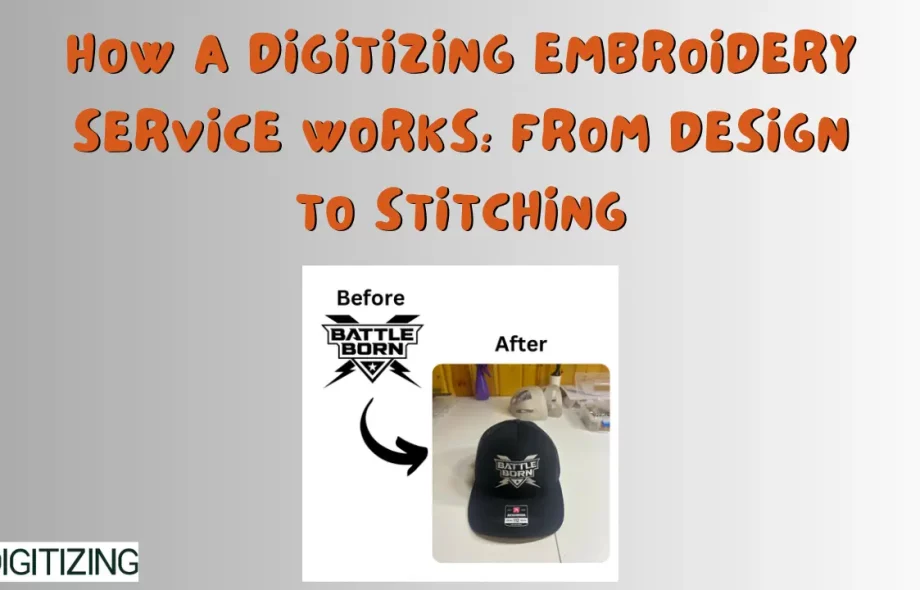
Embroidery transforms fabric into a canvas for creativity, bringing designs to life with thread and precision. Behind every stunning embroidered piece lies a digitizing embroidery service, a process that converts your artwork into instructions an embroidery machine can follow. Whether you’re branding uniforms, crafting personalized gifts, or enhancing apparel, understanding how this service works unlocks its potential. This comprehensive blog takes you through the journey of a digitizing embroidery service, from design submission to final stitching, offering a clear, step-by-step look at how your ideas become reality.
What is a Digitizing Embroidery Service?
A digitizing embroidery service turns digital artwork—logos, illustrations, or sketches—into a stitch file, such as DST, PES, or EXP, that an embroidery machine uses to sew designs onto fabric. This process bridges the gap between a static image and a textured, stitched product, relying on specialized software or professional expertise to ensure every detail is captured accurately. It’s the foundation of modern embroidery, blending technology with craftsmanship.
Why Digitizing is Essential
Embroidery machines can’t interpret a standard image file like a PNG or JPEG—they need a stitch file with precise instructions for every needle movement. Digitizing provides these instructions, making it possible to automate embroidery with speed, consistency, and quality. Without this step, your design remains a concept; with it, it becomes a tangible creation.
The Journey from Design to Stitching
Here’s how a digitizing embroidery service works, step by step, to bring your design from screen to fabric.
Step 1: Submitting Your Design
The process begins with your artwork. You provide a digital file, ideally a vector (AI, EPS, SVG) for its scalability and clarity, though high-resolution raster images (PNG, JPEG, 300 DPI+) are also accepted. This file is the blueprint—its quality sets the stage for the entire digitizing effort.
Step 2: Analyzing the Artwork
Once received, the digitizer—whether a professional or software—examines your design. They assess its complexity, colors, size, and intended fabric to determine how it will translate into stitches. Fine details might need simplification, and colors are matched to thread options, ensuring the design is embroidery-ready.
Step 3: Mapping the Stitches
This is the heart of digitizing. Using software like Wilcom, Hatch, or Brother PE-Design, the digitizer maps out the stitch pattern:
- Running stitches outline shapes or add fine lines.
- Satin stitches create smooth borders or text.
- Fill stitches cover larger areas with texture.
They adjust stitch density (e.g., 0.4 mm spacing) and direction to suit the design’s flow, adding underlay stitches for stability on stretchy fabrics.
Step 4: Sequencing the Colors
For multi-color designs, the digitizer organizes the stitching order to minimize thread changes. For example, all red areas might stitch first, followed by blue, optimizing efficiency. Thread colors are matched to your artwork, often using Pantone codes for accuracy, ensuring the embroidered result mirrors your vision.
Step 5: Customizing for Fabric and Size
The file is tailored to your specific needs. A design for a thick denim jacket requires different stitch settings than one for a delicate silk scarf. The digitizer adjusts parameters—density, underlay, or stitch length—to prevent puckering or distortion, while scaling the design to your specified dimensions.
Step 6: Testing the File
Before finalizing, professionals often create a test stitch-out on a sample fabric similar to yours. This step checks for issues like thread breaks, gaps, or uneven stitching, allowing refinements. It’s a quality control measure that ensures the file performs as intended.
Step 7: Delivering the Stitch File
Once perfected, the stitch file is saved in a format compatible with your embroidery machine (e.g., DST for Tajima, PES for Brother). It’s delivered via email, USB, or cloud download, ready for you to load into your machine and start stitching.
Step 8: Stitching the Design
With the file in hand, you load it into your embroidery machine, hoop your fabric, and thread your colors. The machine follows the digitized instructions, stitching your design with precision. The result is a finished piece that brings your artwork to life in thread.
The Role of Technology in Digitizing
Technology powers this process at every stage. Advanced software provides tools for detailed stitch mapping and real-time previews. AI enhances efficiency by automating stitch patterns and predicting errors. Cloud platforms streamline file delivery, making the journey from design to stitching faster and more seamless than ever.
Benefits of Professional Digitizing
Professional digitizing services elevate the process:
- Precision ensures every stitch aligns with your design.
- Speed delivers files in 24-48 hours, ideal for deadlines.
- Quality produces durable, visually stunning embroidery.
- Expertise handles complex designs that software alone might miss.
These advantages make professional services a go-to for flawless results.
DIY vs. Professional Digitizing
You can digitize yourself or hire a service—each approach has its place:
- DIY uses software like Hatch or free tools like Ink/Stitch, offering control but requiring skill and time.
- Professional services provide expert files quickly, perfect for intricate or urgent projects, though at a cost ($10-$50 per design).
DIY works for hobbyists; pros suit those needing perfection without the effort.
Real-Life Examples
A small business submits its logo for digitizing, receiving a file that perfectly embroiders 50 polos for staff, boosting brand visibility. A crafter sends a child’s drawing, which becomes a stitched patch on a backpack, delighting its recipient. A designer digitizes a floral pattern, turning it into an embroidered accent on a dress, sold at a boutique. These cases highlight how digitizing turns ideas into stitched successes.
Tips for a Smooth Digitizing Process
To ensure success:
- Submit clear, high-quality artwork for best results.
- Specify fabric type, size, and machine format upfront.
- Request a sample stitch-out to preview the outcome.
- Provide color codes (e.g., Pantone) for exact matches.
Clear communication keeps the process on track.
Common Challenges and Solutions
Challenges can arise:
- Blurry artwork leads to poor stitches—use vectors or high-res files.
- Complex designs overwhelm basic tools—opt for pros.
- Format mismatches halt machines—confirm compatibility early.
Addressing these upfront ensures a smooth journey.
Conclusion
A digitizing embroidery service works by transforming your design into a stitch file through a meticulous process, from artwork analysis to final stitching. It blends creativity with technology, delivering precision, quality, and efficiency that elevate your projects. Whether you’re branding a business or crafting a personal piece, understanding this journey empowers you to harness its full potential. Ready to see your design stitched? Partner with a digitizing service and watch your artwork come alive on fabric!
FAQs About Digitizing Embroidery Services
What does a digitizing embroidery service do?
It converts artwork into a stitch file for embroidery machines to sew onto fabric.
How long does the digitizing process take?
Professionals deliver in 24-48 hours; DIY varies from minutes to hours.
What file formats are created?
Common ones include DST, PES, EXP, based on your machine.
Can any design be digitized?
Yes, if clear—small details may simplify for stitching.
Why not digitize myself?
DIY works but lacks the speed and expertise pros offer for complex needs.
How is the file tested?
A sample stitch-out checks for errors before delivery.
What happens after I get the file?
Load it into your machine, hoop fabric, and stitch your design.


